Back to Infographics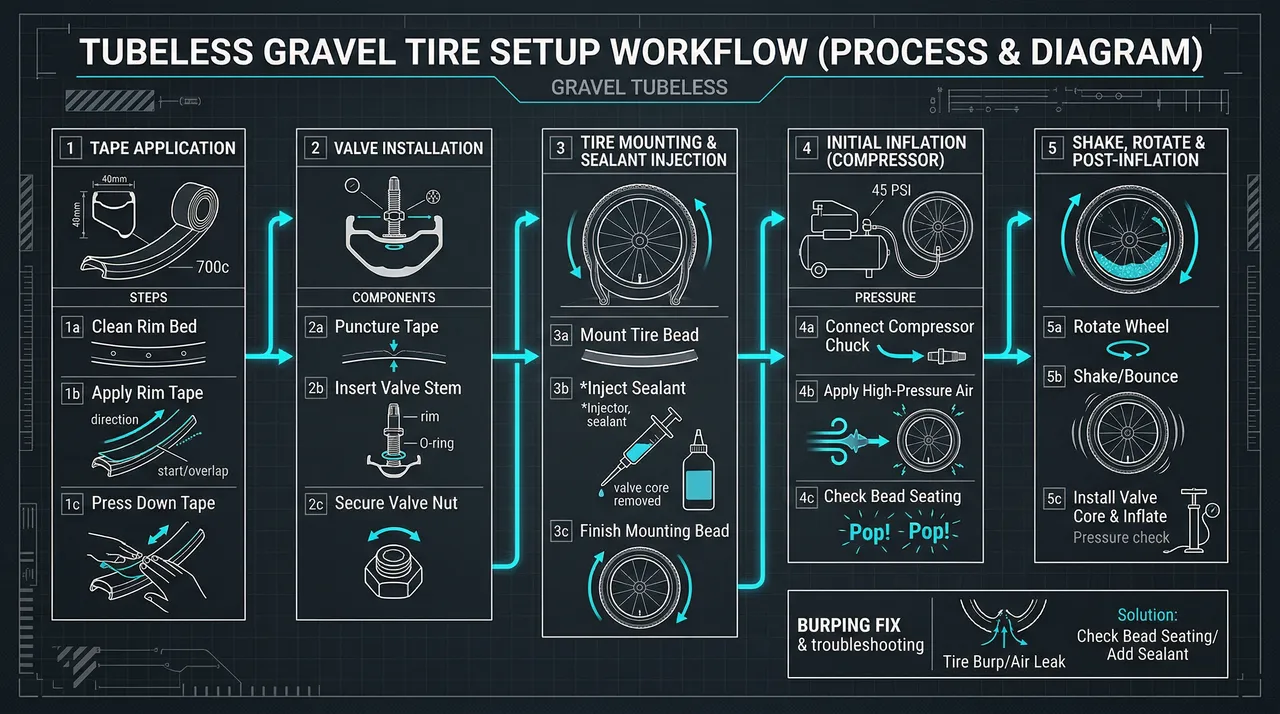
Setup
Gravel Tubeless Setup Flowchart
Complete step-by-step visual guide: tape, valves, sealant, burp-fix — no more guesswork.
Embed This Infographic
Copy this HTML to embed on your blog, forum, or website. Attribution appreciated but not required for non-commercial use.
<iframe src="https://cranksmith.com/infographics/gravel-tubeless-setup-flowchart" width="800" height="600"></iframe>Every gravel rider eventually goes tubeless. The question is whether it takes 10 minutes or 3 hours — and that entirely depends on following the right sequence.
This flowchart walks through every step: rim tape application (how many wraps), valve stem installation (seal the hole first), tire seating (soap trick, compressor trick, booster trick), sealant injection (amount per tire width), and the burp-fix protocol for when a bead won't seat.
Bookmark this, print it, tape it to your workbench bench.
Related Article
Gravel Tubeless Setup — Step-by-Step Guide →